3 steps for managing users and licenses in the Microsoft Cloud
Step 1 Add users one-at-a-time in the dashboard view
Note
If you are already using Microsoft 365 and added the correct users, you can skip this step and go to step 2.
- Go to the admin center: https://admin.microsoft.com
- Go to Users > Active users, and select Add a user.
- In the Set up the basics pane, fill in the basic user information, and then select Next.
- Name Fill in the first and last name, display name, and username.
- Domain: Choose the domain for the user's account. For example, if the user's username is Jakob, and the domain is contoso.com, they'll sign in by using jakob@contoso.com.
- Password settings: Choose to use the autogenerated password or to create your own strong password for the user.
- The user must change their password after 90 days. Or you can choose to Require this user to change their password when they first sign in.
- Choose whether you want to send the password in email when the user is added.
- In the Assign product licenses pane, select the location and the appropriate license for the user. If you don't have any licenses available, you can still add a user and buy additional licenses. Expand Apps and select or deselect apps to limit the apps the user has a license for. Select Next.
- In the Optional settings pane, expand Roles to make this user an admin. Expand Profile info to add additional information about the user.
- Select Next, review your new user's settings, make any changes you like, then select Finish adding, then Close.
For more information regarding adding users, you can visit this page from Microsoft.
Step 2 Assign licenses to the correct users
- Access the admin center at https://admin.microsoft.com.
- Navigate to Users > Active users and select the user by clicking on their display name.
- On the right-hand side of the screen, click on "Licenses and apps."
- Assign the appropriate license based on user type:
- Business Central Essentials for full users.
- Business Central Team Member for limited users.
- Business Central External Accountant for Boltrics and partner (Partner applies only for international customers).
Important
Assign the 'Super' permission set to all users, including external accountant license to the Boltrics and partner user. If custom permission sets are preferred, ensure they provide the required access and functionality, but maintain the 'Super' permission set for Boltrics and partner user.
Tip
If you would live to know the difference between Essential and Team members, please visit: Essential vs Team members.
Step 3 Add user to the Business Central 365 environment
You have now assigned the licenses to the right users. This means they should be able to login to the right Microsoft Business Central environment. However, sometimes an additional sync is necessary to activate this user in the production environment. There are three scenario's to walkthrough.
Scenario 1: Did you receive the production environment URL?
- New customer: contact the assigned Boltrics project manager or consultant to receive your production environment URL.
- Existing customer: contact your internal key user for the right URL. If this is not sufficient, please contact our support department and ask for the correct URL.
Scenario 2: New license was assigned in the admin centre, but unsure if the user is added to Business Central
Check if the user is visible in the production environment by searching for "users" to open the user list.
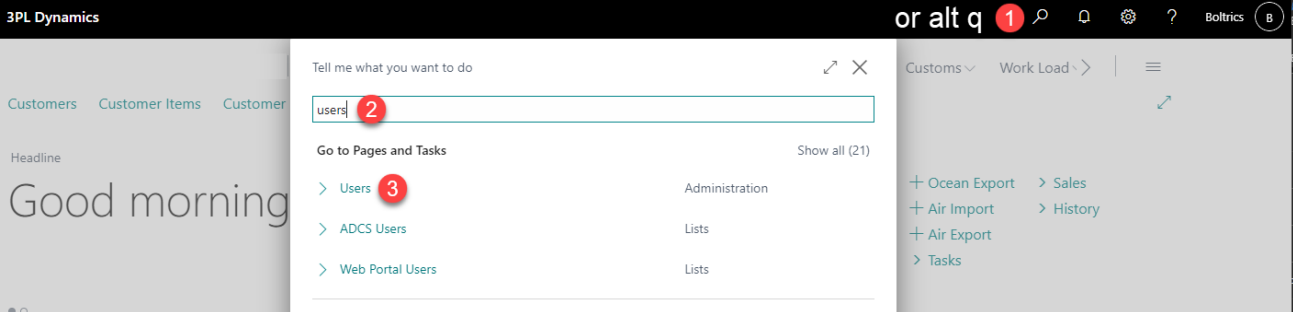
Check if the user is visible in the user list by searching for their name. In the image below we are using "Chris" as an example.
f the user is visible, you can proceed to the next scenario. If the user is not visible go to the ribbon > Process > "Update users from Microsoft 365". The user should be added.

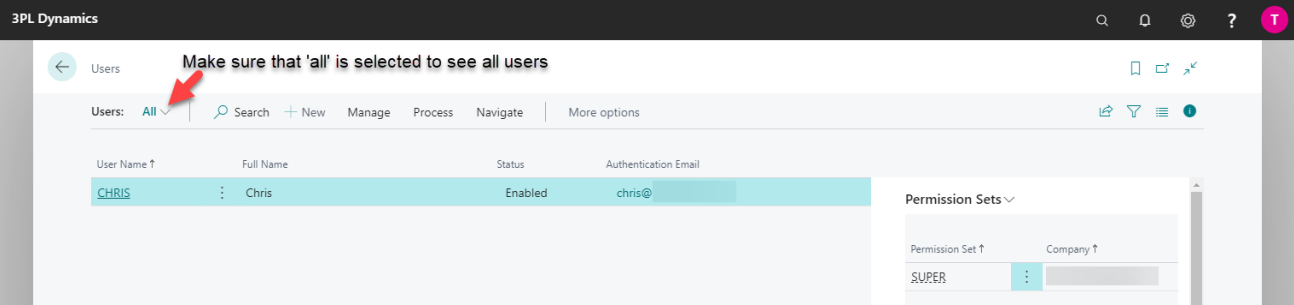
Scenario 3: Adding the correct permission set
- Click on the user to open the user card.
- Scroll down to Permission sets.
- Add "SUPER" to the permission set. This means that the user will have no restrictions within the allowed
license.

When all scenarios are followed and executed, the user should be able to login.
Questions and Answers
| Question | Answer |
|---|---|
| I see more users in the "user list" while I didn't add those users. | You might see other users in the Users list apart from those from your own company. When a delegated admin (Boltrics) logs into your Business Central environment, they are automatically created as a user inside Business Central. This way, the actions performed by a delegated admin are logged in Business Central, such as posting documents, and associated with their user ID. Want to know more regarding assigning permissions to users and groups? Go to this page. |
| I need more users than I'm allowed within the admin center. | You can contact finance@boltrics.nl to order more users. Please inform us on the type of user (Business Central Essential or Business Central Team Member) you would like to add. |
| Can I downgrade if I am not using all licenses? | Yes, you are able to upgrade or downgrade every month. If you want to do so, send an email to finance@boltrics.nl. |
| Can I remove existing users from the license? | Yes, you can. If you want to remove existing users you can go to the admin center and retract the assigned license of the specific user and assign this license to a new user.If you want to disable the user immediately please go to Business central > search for users > open the existing user -> put user status on "Disabled". |
| I followed all steps above but I'm still not able to login. | Please check if the user is enabled and authentication is email is filled within Business Central: 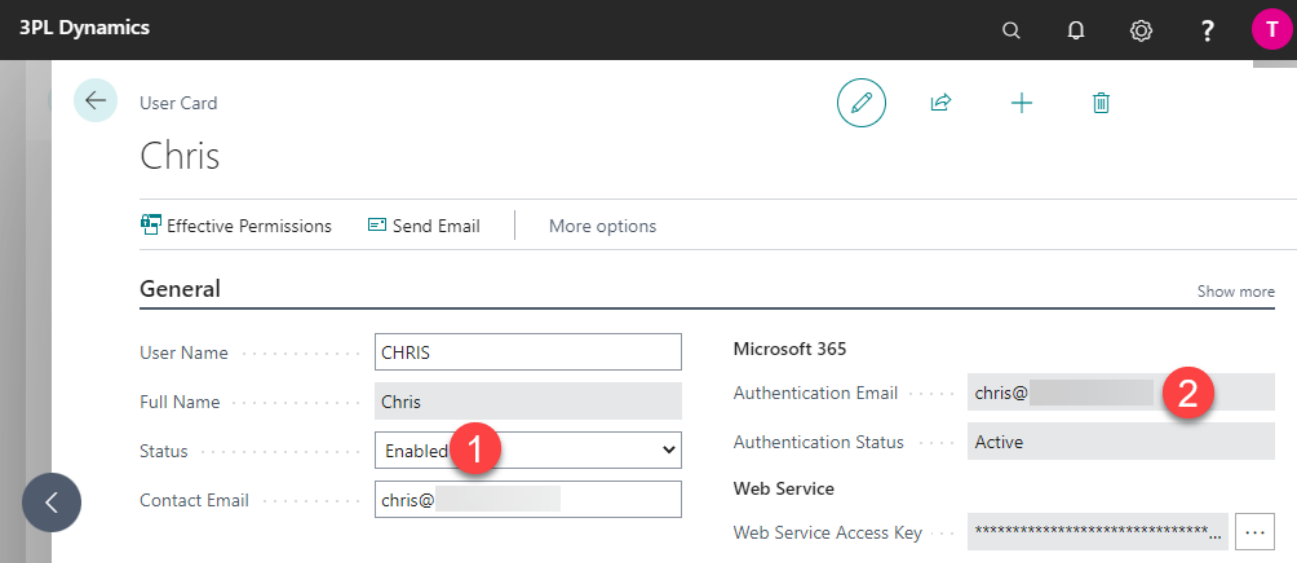 |
If you are in a new implementation process and you can't figure it out, please contact the consultant. Are you an existing customer and the step-by-step plan does not work? Then you can follow a training via the Boltrics Academy, or submit a request. Are you managing your customer's IT processes and can't figure it out? Please contact the key user within the company, who can help you further.