CMR Editor
The CMR editor allows you to flexibly determine the content of the CMR for your results. The CMR editor consists of 3 different parts.
- The Blueprint editor where you create the CMR template.
- The values you enter in the blueprint editor.
- De Layout of the report.
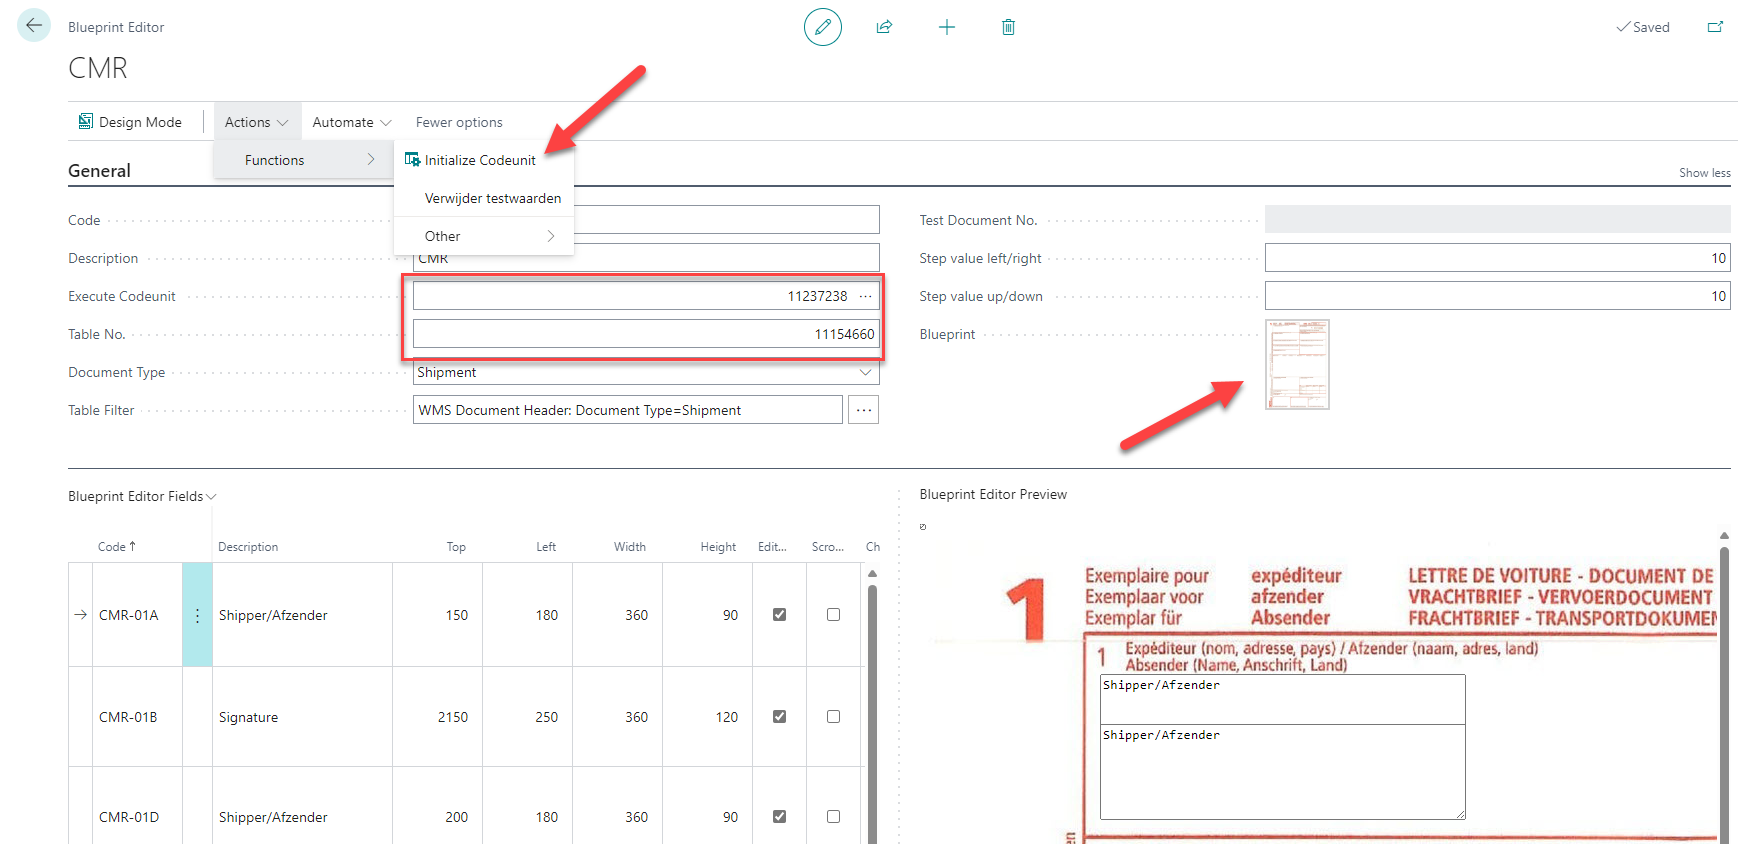
By searching for the Blueprint editor list a CMR blueprint can be created. You fill in the fields as shown in the image below, after filling in the codeunit you press initialize codeunit. The fields will then appear below. You also need to upload an image of a CMR as a template for the visualization. You can place the boxes in your CMR using the editor fields and the Top value, Left value, Width and height.
When clicking on Preview in your Shipment document header, you will see an example CMR of how it would look for this result. The values are retrieved from the result and visualized. In this preview mode you can adjust values. These adjusted values are saved under the Editor Default fields. This can be found in the action bar of your result document header.
You can also link the default values of the CMR fields to customer cards or address cards by searching for Editor Default Fields in the action bar of these pages. Fill in the blueprint editor code, which CMR field it concerns, and the value that should be entered. At the moment that this customer or address is then added to your result, these values are automatically added to the Editor default fields. Please note that not all modified fields appear on the Printed CMR. This has to do with the layout of the CMR report.
To print the CMR use report 11154686. As previously stated, it depends on the layout of the report and which custom fields appear on the printed CMR. The layout overrules this, you will then have to create a Custom Layout for this report to create your own rule which Editor default values should appear on the printed CMR.