Import Inventory
The Import Customer Inventory functionality allows you to import existing inventory into 3PL Dynamics. This feature is particularly useful when you have physical inventory already in your warehouse that needs to be registered in the system, such as during initial implementation of 3PL Dynamics.
Preparation
Before importing customer inventory, you'll need to prepare an Excel file containing all the necessary information. A template is available for this purpose and can be accessed through the 'Import Customer Inventory' menu. To locate this template:
- Search for and open the 'Import Customer Inventory' menu
- The following page will appear:
- Click the 'Download' button next to the Template field to obtain the Excel template
Important
Template Structure
Please maintain the original structure of the downloaded template. Do not rearrange columns (e.g., moving column A to column F) as this will prevent the import from functioning correctly.
The Excel template includes all available fields that can be populated for inventory. The specific fields you need to complete will depend on your particular configuration, but certain fields are always required.
Required Fields
| Field | Description |
|---|---|
| Posting Date | The date when the inventory will become available in the system. This date is also used for calculating storage charges. |
| Customer No. | The customer number to whom this inventory belongs. The customer must exist in the system prior to import. You may use values from the 'No. 2' or 'No.' field on the customer card. |
| Customer Item No. | The customer item number for the inventory. The customer item must exist in the system before importing. You may use values from the 'External No.', 'No. 2' or 'No.' field on the customer item card. |
| Handling Unit No. | The identifier of the handling unit where this inventory is stored. If multiple customer items or inventory with different specifications are stored on a single handling unit, you may use the same handling unit number more than once (ensure the correct import option is selected in this case). |
| Handling Unit Type Code | Specifies the type of handling unit being used. |
| Location No. | The warehouse location where this handling unit is stored. The location must exist in the system prior to import. |
| Quantity | The quantity of the customer item in the specified unit of measure that is stored on/in the handling unit. |
| Unit of Measure Code | The unit of measure code associated with the quantity. This unit of measure must exist in the system before importing. |
Importing Data
To import your prepared data:
- Search for and open the 'Import Customer Inventory' menu
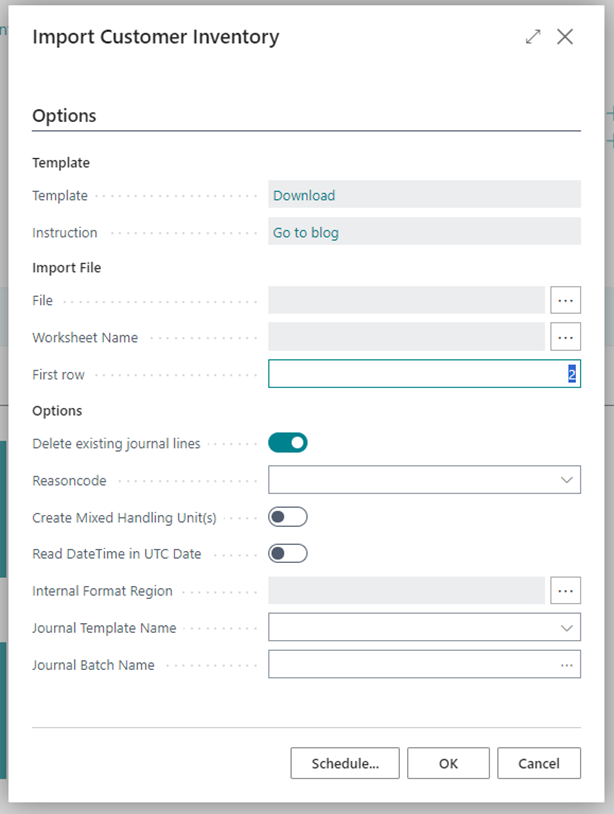
- Configure the import settings as follows:
Import File Settings
- File: Select your file by clicking the button on the right side
- Worksheet Name: If your file contains multiple worksheets, specify which one contains the data to import
- First row: Default is set to 2, meaning the import will begin from the second row of the Excel file (assuming row 1 contains headers)
Options
- Delete existing journal lines: Enabled by default. This removes existing journal lines from the target journal to prevent importing data not included in your Excel file.
- Reason code: Optional field for tracking purposes. The code will be stored in item ledger entries (e.g., "Conversion" is commonly used for initial inventory imports).
- Create Mixed Handling Unit(s): Enable this option when you have handling units containing multiple customer items or inventory with different specifications.
- Read DateTime in UTC Date: When enabled, dates and times in the template will be interpreted as UTC Date/Time.
- Internal Format Region: Select the appropriate region to ensure dates, times, and numbers are formatted according to regional standards.
- Journal Template Name: Select the journal template to use for the import.
- Journal Batch Name: Select the journal batch to use for the import.
- Click 'OK' to import the data from your Excel file into the Item Journal (3PL)
- Review the imported data in the journal, as shown below:
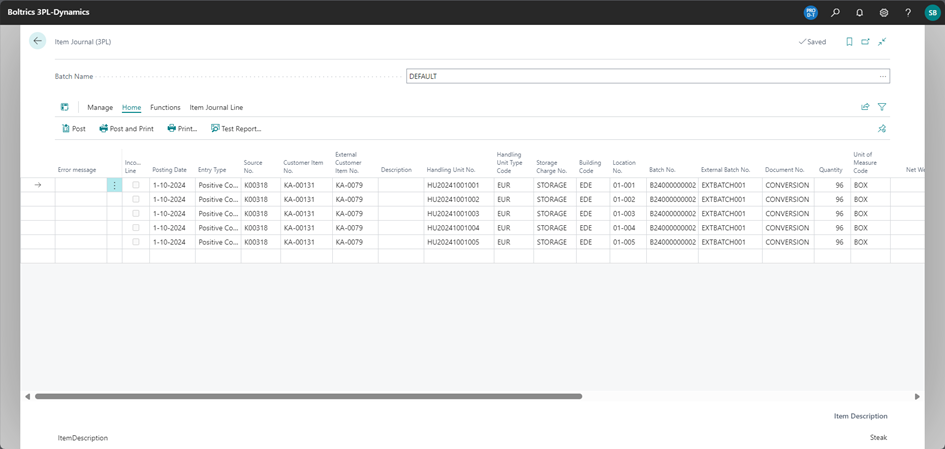
If any errors occur during import, they will be displayed in the 'Error Message' column. In this case, correct the data or adjust your system setup and import the Excel file again.
After verifying that all information is correct, click 'Post' to finalize the process. Once all lines have been successfully posted, the inventory will be available in 3PL Dynamics.