Item Transfer Journal
Use the transfer journal when you want to move a part of the inventory or update certain fields. For example, you can relocate Handling Unit TEST123 to a different location or update characteristic fields. If a container number was mistakenly entered upon receipt, you can correct this by submitting a transfer proposal. In the “New Container Number” field, enter the correct number to update the details.
It is important to mind, that the header that starts with - New -, is the field to fill in the new value. Also for this journal, you may get the Handling Units in the journal by use of different methods.
1. Make sure the right Handling Unit is selected.
There are multiple ways to select your Handling Unit, two possible ways will be recommended here:
Via Handling Unit Content
A Select your Handling Unit(s) to make an adjustment to, click on functions and click on "Create Journal Line(s).
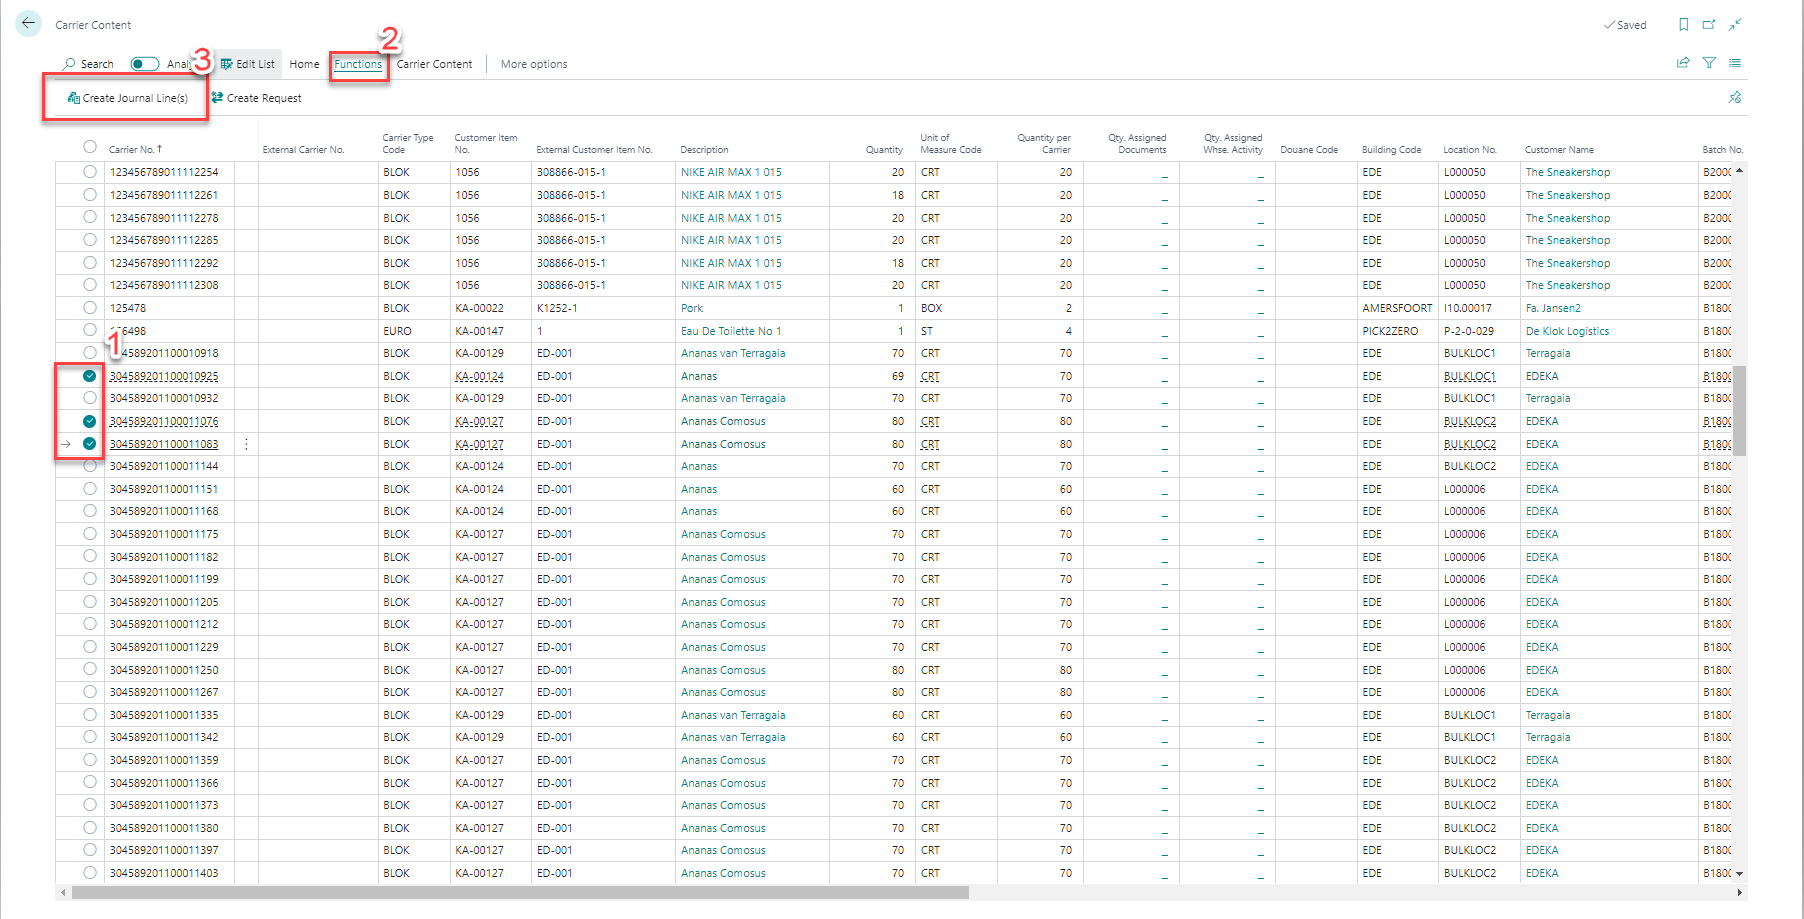 B Select journal type: Transfer, select an available journal template and batch, select your desired posting date, fill in a document no, and fill in a reason code.
Using the Item Transfer Journal
A when you open the Item Transfer Journal, click on calculate inventory B Fill document no. , reason code and make the filters for the Handling Units you would like to change.
How Different Batch Content Records Are Created
A batch may consist of multiple pallets (Hanlding Units). When fields in the inventory are updated within a journal, the system searches for existing inventory to adjust. If no matching record is found, a new entry is created. By default, the system matches on the following fields:
- Customer Item Number
- Storage Fee Number
- Production Date
- Expiration Date (THT Date)
- External Batch Number
- Handling Unit Type Code
- Customs Code
- All Characteristics
- Item Condition
- Quantity per Handling Unit
- Vessel Number
- Container Number
- Freezing Date
- Country of Origin
- Country of Destination
- Dangerous Goods Characteristic ID
- Document Characteristic ID
- Allocation Characteristic ID
- Location Code
- Unit Code
When updating one of these fields in a journal, such as in the transfer journal, and there are multiple Handling Units in a batch with varying values, the system will create a new batch entry.
Note
If you change characteristic fields, a new batch is created (if you have batch matching enabled on the customer item). If you do not want this to happen, update the “New Batch Number” field to match the existing batch.
Note
When booking an inbound transaction where the batch is the same but one of these fields differs, adjusting the fields back will merge the records again, provided there are no differences between them.
2. Assign a reason code to all lines without one
When a journal batch contains many lines, you do not have to fill in the Reason Code field line by line. Use Functions > Assign Reason Code on the Item Transfer Journal to give one reason code to every line in the batch that has no reason code yet. Lines that already have a reason code are left as they are.
- Open the Item Transfer Journal and select the journal batch. The function works on all lines within the current filters, just like Functions > Delete lines: if you only want to update a part of the batch, set a column filter on the lines first.
- Choose Functions > Assign Reason Code.
- A list of reason code values opens. The list is based on the first line without a reason code, so it only shows the values that are allowed for that line. Select a value and choose OK. If you cancel here, nothing is changed.
- Confirm the question "Assign reason code ... to ... journal lines without a reason code?". The number tells you how many lines will be updated. Choose No to leave all lines unchanged.
- The reason code is assigned to every line within the filters that had no reason code, and the message "... journal lines have been updated." shows the number of updated lines.
Note
If every line within the current filters already has a reason code, the message "There are no journal lines without a reason code." appears and nothing is changed.
Note
The selected reason code must be allowed for every line that is updated. Because the list of values is based on the first line without a reason code, the code may not be allowed for one of the other lines, for example when the reason code relations differ per customer. In that case the function stops with an error and none of the lines are updated. Filter the lines and assign the reason code per group instead. See Reason Codes for how reason codes, their values and relations are set up.
Reason code on Transfer Inventory and Transfer Suggestion
The Reason Code field on the Transfer Inventory page and on the request page of Functions > Transfer Suggestion is no longer marked as mandatory, even when the journal template has Require Reason Code enabled. The field is still filled with the default reason code from the journal template or journal batch, and you can still change it there.
Posting has not changed: when Require Reason Code is enabled on the journal template (Journal Templates (3PL)), a journal line without a reason code still cannot be posted. Use Functions > Assign Reason Code to fill in the missing reason codes before you post the batch.