Forwarding Data integrations
Message type
More information will follow soon.
Managing Integration Messages in the Voyage List
With the new functionality in the FMS Voyage Call List, you can manage Integration Messages more efficiently. Below is a step-by-step guide to understand and use this feature:
1. Accessing Integration Messages
- Navigate to the FMS Voyage List, select a specific Voyage, and click on Data Integration>Integration Messages at the Voyage Calls tab. The list will display all outstanding integration messages related to the selected voyage call. These messages can be automatically generated based on predefined templates, simplifying the process of identifying required messages.
Example: If the Voyage Call is at the Port of Rotterdam, the system will automatically generate the required messages for that specific situation, eliminating the need to manually determine which messages are necessary.
2. Viewing and Editing Message Details
Open a message to view its content.
The Header section contains detailed information, including:Status: Indicates the status of the message. For example NEW Indicates that the message needs to be sent but has not yet been created.
Description: The type of manifest or message.
Direction: Specify whether it is for Import or Export.
Sender Code: The origin of the message.
Receiver ID: The destination of the message.
The Processing Function Code field serves as a kind of library, gathering all the necessary information that needs to be sent out as a message. This library can be extended with additional options as needed.
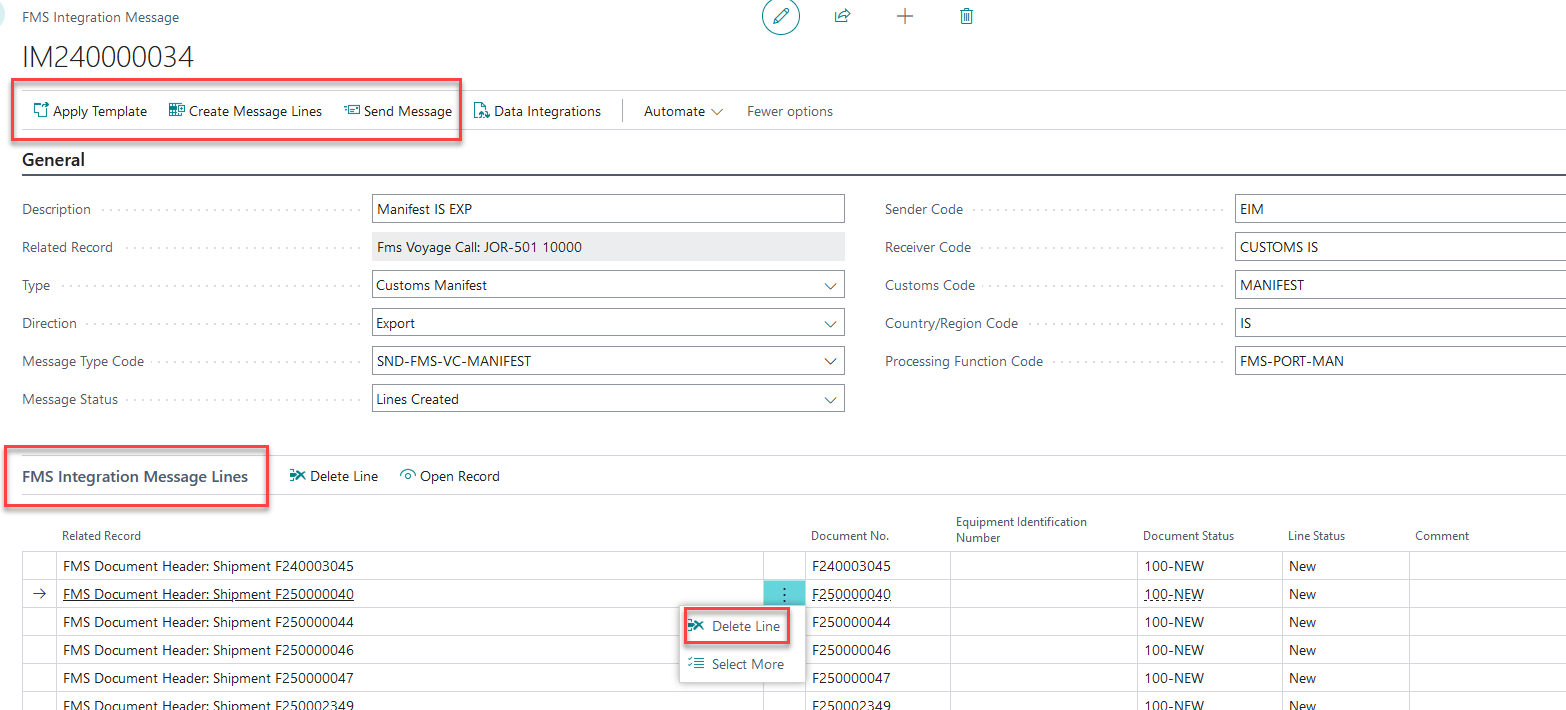
3. Creating and Sending Messages
You can manually create a new message, either based on a template or from scratch by clicking on New or New from Template button in the action bar.
Once you create a message, the system will compile all related shipments into a list under FMS Integration Message Lines.
The list will display fields such as Status and Comments.
If there is a shipment you do not wish to include, you can easily delete that line from the list.
After reviewing the content of the message, you can send it by clicking on the Send Message button.
Once sent, the message status in the Header will be updated to DI Message Created.
4. Handling Responses
When a response is received (e.g., from a customs authority), the status of the message can be updated at the LINE level.
Example: The status may change to FAILED, with a reason provided in the Comments field.
This gives you a clear overview of the message's progress and any issues encountered.
5. Scheduling Messages
If needed, you can schedule a message to be sent at a specific, preferred time.
This option allows flexibility in managing the message flow.