Visual Planning - User Setup
General
On the page Visual Planning - User Setup, various settings can be configured for the User when opening Visual Planning.
The page can be opened from the role centre by choosing: Setup > TMS Setup > Visual Planning Setup > Visual Planning User Setup.
Functionality
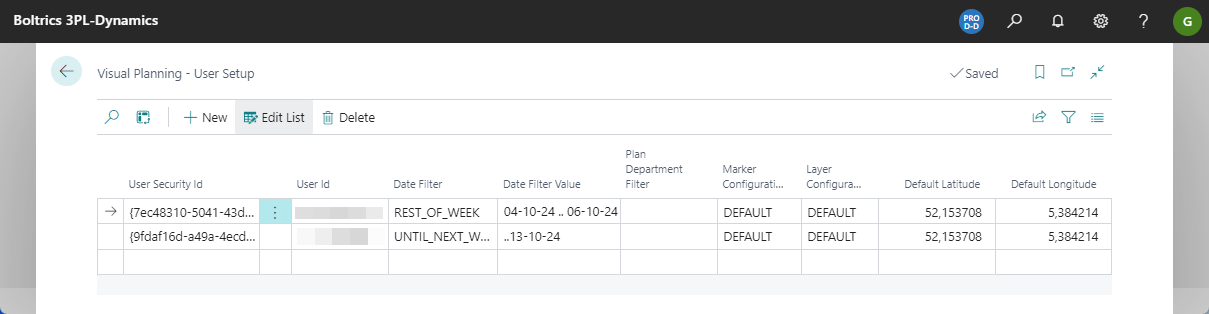
Actions
New: Creates a new line above the selected line.Edit List: Switches between view mode and edit mode.Delete: Deletes the selected line.
Fields
User Security Id: Click in the field on the selection button to open the selection list and select the required User.User Id: This is filled automatically when theUser Security Idis selected.Auto Refresh Interval (seconds): Number of seconds between automatic refreshes of the Visual Planning editable-grid experience. Leave empty to disable; the lowest possible value is 30 seconds.Date Filter: Select a value. The filter is automatically applied when opening Visual Planning. A maximum of 5 days is advised because of performance reasons.Date Filter Value: Shows the actual filter based on the selectedDate Filter.Plan Department Filter: Select a default Plan Department value to be applied when opening the Visual Planning screen.Marker Configuration: Click in the field on the selection button to open the selection list and select the required Marker Configuration.Layer Configuration: Click in the field on the selection button to open the selection list and select the required Layer Configuration.Timeline Setup: Click in the field on the selection button to open the selection list and select the required Timeline Setup. Only applicable whenVersionis Timeline.Default Top Left View: Select which view is shown in the top-left window when opening Visual Planning.Default Top Right View: Select which view is shown in the top-right window when opening Visual Planning.Default Bottom Left View: Select which view is shown in the bottom-left window when opening Visual Planning.Default Bottom Right View: Select which view is shown in the bottom-right window when opening Visual Planning.Version: Which visualisation is applicable on the Visual Planning Trip window:
- Default, an editable trip grid.
- Timeline, a Gantt view; see Visual Planning Timeline.Application Type: The following options:
- Planning, when creating and editing trips
- Trip Follow-up, when only monitoring the progress of trips planned.Route Polygon Type: How a trip's route is drawn on the Visual Planning Map, options:
- Exact, the calculated route.
- Schematic, a simplified line between stops.Map Version: Options:
- Markers, the map shows individual (spiderfied) Markers.
- Clusters, the map combines markers into a cluster; see Marker Configuration - Markers vs. clusters.Show Stop Nos in Route Markers: Whether the markers of the stops on a trip route show stop numbers.Default Latitude: This value is used to center the map on Visual Planning - Map.Default Longitude: This value is used to center the map on Visual Planning - Map.Add Section To Trip: How a section is added to a trip when dragged onto it: Consolidate (try to combine the From/To address with an existing stop) or Add Last (always add after the last stop).Unplanned Section Sorting: Click in the field on the selection button to open the selection list and select the default Sorting Template for the Unplanned Sections window.